
HOW TO DESIGN & BUILD AN
Above-Ground Pond
Products:
Complete Filter Kit with Pump
1/2 in. ID Vinyl Tubing (optional)
Spitter (optional)
Tools:
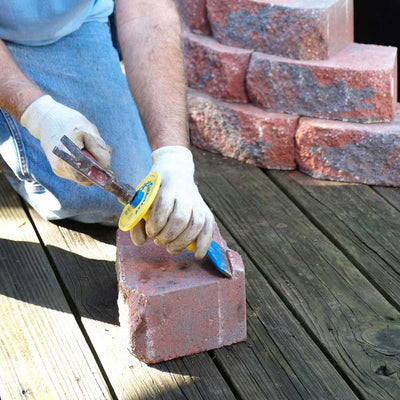
Chisel & Hammer
Protective gloves
Safety Eyewear
Decorative Items:
20-gallon rigid liner
30-40 paver stones
Before you start planning, take a look at these helpful pond tips!
1
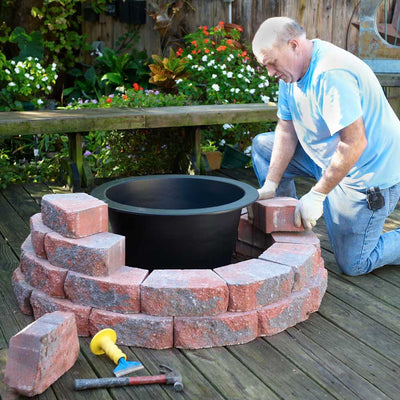
Place the rigid liner in the desired location and mark where the wall blocks should rest. Place the base row 6” away from the bottom of the liner.
TIP! To prepare the base row on a solid surface, the rear “lips” of the block must be removed by striking them with a sledgehammer (approximately 10 stones).
TIP! To prepare the base row on a solid surface, the rear “lips” of the block must be removed by striking them with a sledgehammer (approximately 10 stones).
2
Begin building the next tier of the pond wall. Each block has a “lip” located on the back of the stone. This lip creates a “lock” effect. When placing the lip down, make sure it is centered over the gap of the bottom tier. Repeat step three for the third and fourth tiers
TIP! The seams should not line up when creating the second, third and fourth tiers.
TIP! The seams should not line up when creating the second, third and fourth tiers.
3
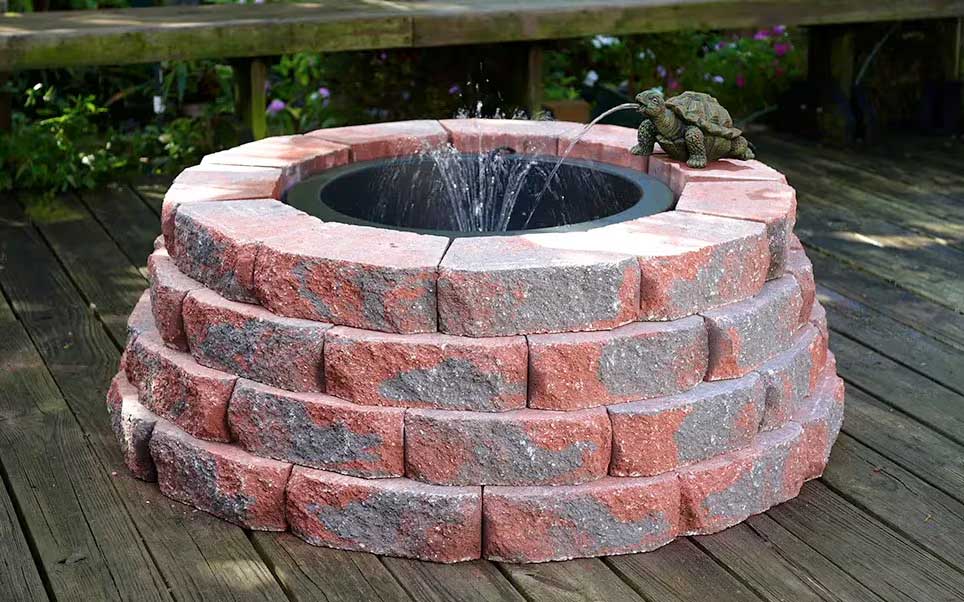
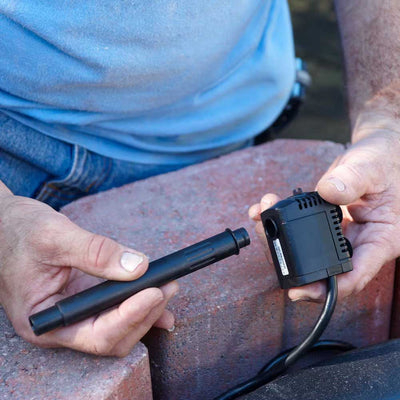
Add Complete Filter Kit with Pump. Fill the rigid liner with water to 2” below the top of the liner.
Optional! Add a spitter by attaching 1/2 in. ID Vinyl Tubing to the diverter valve of the Complete Filter Kit.
Optional! Add a spitter by attaching 1/2 in. ID Vinyl Tubing to the diverter valve of the Complete Filter Kit.
Start Shopping For Your Above-Ground Pond
TotalPond Shopping List:
Complete Filter Kit with Pump
1/2 in. ID Vinyl Tubing (optional)
Spitter (optional)